Overview
This guide outlines the standard procedure for initializing an STM32 project using STM32CubeMX with VSCode
1. Project Initialization
Depending on your starting point, choose one of the two methods below:
Option A: New Project
- Navigate to
File>New Project. - Use the MCU/Board Selector to choose your specific hardware.
Option B: Import Existing Configuration (.ioc)
- Navigate to
File>Import Project. - Browse to and select your
.iocfile path. - Click OK to load the existing configuration (default settings are recommended).
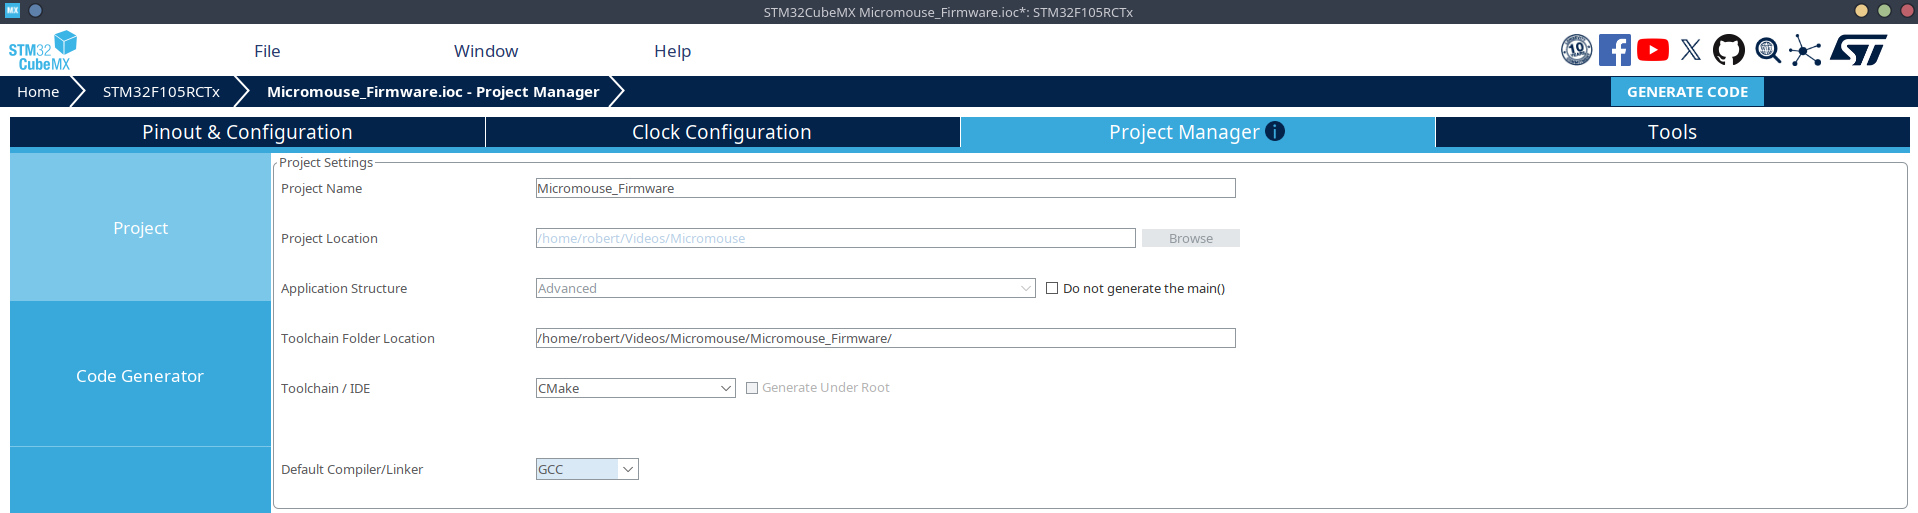
2. Project Manager Configuration
Switch to the Project Manager tab and apply the following settings:
| Setting | Selection |
|---|---|
| Project Name | Insert your project name |
| Application Structure | Advanced |
| Toolchain / IDE | CMake |
3. IOC Configuration
IOC file configuration is entirely dependent on your use case. But here's an example:
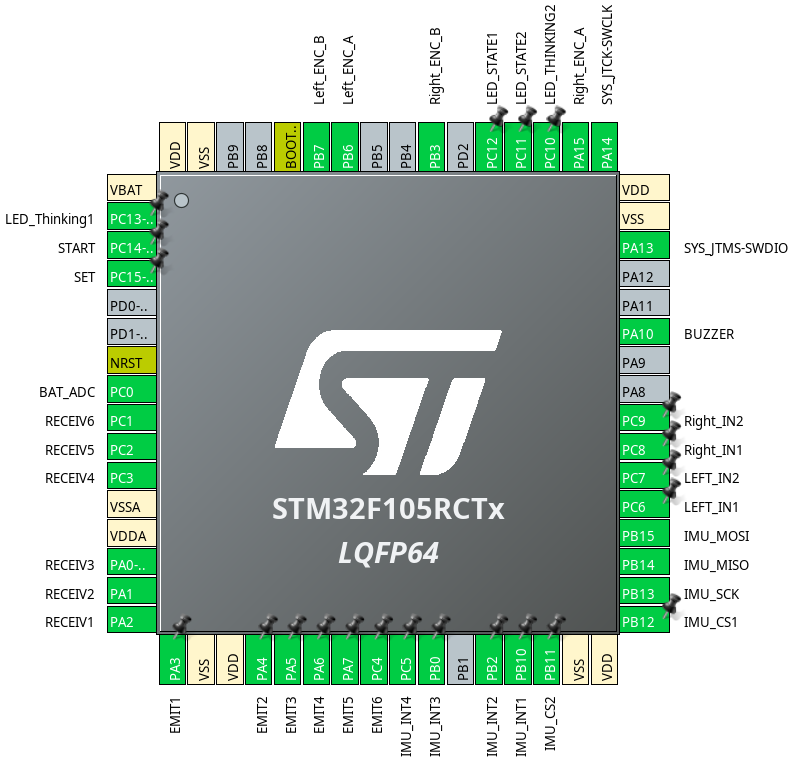
Common Mistakes on IOC Configuration
- Clock Configuration: Make sure to run the automatic clock configuration with the desired EXTERNAL crystal oscillator frequency.
- If you don't do this, the STM32 will just run off of its internal crystal.
- This is important if you are trying to use USB 2.0 High Speed.
- Example above doesn't use a crystal oscillator, but AV has been using Active Crystal Oscillators with the Bypass Clock Source setting
- Peripherals Timing: Keep in mind the prescalars and baud rates for SPI/I2C and UART respectively.
- 90% of the time, an error when trying to talk to a downstream device (e.g., reading nothing or garbage data) is because your timing is wrong from these settings.
4. Code Generation
Before finalizing, ensure your settings match the configuration shown below:
- Click GENERATE CODE in the top-right corner.
- STM32CubeMX will generate the
CMakeLists.txtand necessary Hardware Abstraction Layer (HAL) drivers.
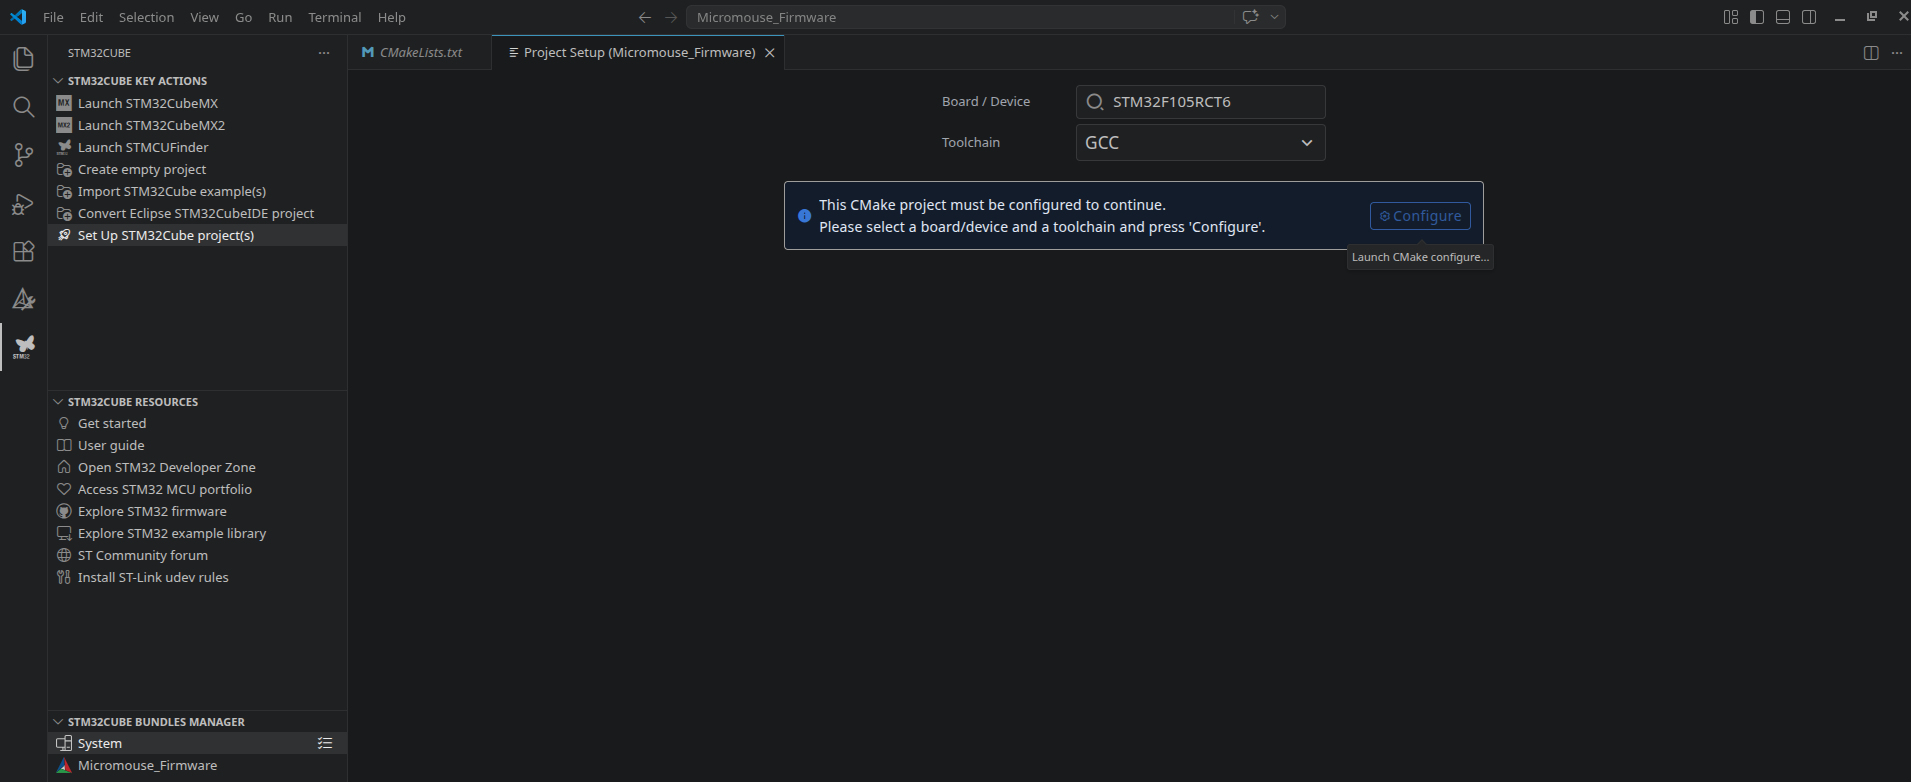
5. VSCode Setup & Extensions
After generating code in CubeMX, transition to VSCode:
Required Extensions
- STM32 VS Code Extension (Official from STMicroelectronics)
- CMake
Workspace Initialization
- Open the generated project folder in VSCode.
- In the bottom right notification, select "Open CMake project as STM32 Project".
- Open the STM32 Cube Extension tab on the left sidebar.
- Select your specific MCU, toolchain (GCC), and press Configure.
To verify the initial C project, we can build the project:
- Open the CMake extension tab.
- Locate and press the build button in the CMake extension.
Project Status>Build>Build
- Ensure the terminal outputs with no errors:
Build finished with exit code 0
6. Upgrading to C++ & Custom Drivers
To support C++ development and include Avionic's driver libraries (e.g., RocketDrivers), Avionics creates a separate, C++, main file that
is separate from the STM32CubeMX's generated main.c file. This allows us to work in a new file that isn't cluttered by STM32's hardware
definitions.
File Structure Setup
- Create
Core/Src/main.cppwith the functioncpp_main().#include "main.h" #include "cpp_main.h" void cpp_main(void) { // Your C++ code here // ... while (1) { // ... } } - Create
Core/Inc/cpp_main.hand declarecpp_main().#ifndef CPP_MAIN_H // Prevents multiple inclusions of this header #define CPP_MAIN_H #ifdef __cplusplus extern "C" { // Disables C++ name mangling so C code can link to this #endif // Bridge from C startup code into your C++ application void cpp_main(void); #ifdef __cplusplus } // Closes extern "C" block #endif #endif // CPP_MAIN_HP - Clone AV's firmware library
RocketDriversinto the root directory for your project.git submodule add https://github.com/UCI-Rocket-Project/rocket-stm32hal-drivers RocketDrivers
Bridge C to C++
In main.c, add the C++ entry point:
C file
/* USER CODE BEGIN Includes */
#include "cpp_main.h"
/* USER CODE END Includes */

// ... inside main() function ...

/* USER CODE BEGIN 2 */
cpp_main();
/* USER CODE END 2 */
Cmake file
The automatically generated CMake needs to be updated to support the added folder/files added.
cmake_minimum_required(VERSION 3.22)

# Setup compiler settings
set(CMAKE_C_STANDARD 11)
set(CMAKE_C_STANDARD_REQUIRED ON)
set(CMAKE_C_EXTENSIONS ON)

# Define the build type
if(NOT CMAKE_BUILD_TYPE)
    set(CMAKE_BUILD_TYPE "Debug")
endif()

# --- DIFFERENCE: Project name was changed from 'ECU_Main' to your sepecific project ---
# Set the project name
set(CMAKE_PROJECT_NAME ECU_Main)

# Enable compile command to ease indexing with e.g. clangd
set(CMAKE_EXPORT_COMPILE_COMMANDS TRUE)

# Core project settings
project(${CMAKE_PROJECT_NAME})
message("Build type: " ${CMAKE_BUILD_TYPE})

# --- DIFFERENCE: Added CXX to enable C++ compiler support ---
#  Enable CMake support for ASM, C, and C++ (CXX) languages
enable_language(C ASM CXX)

# Create an executable object type
add_executable(${CMAKE_PROJECT_NAME})

# Add STM32CubeMX generated sources
add_subdirectory(cmake/stm32cubemx)

# Link directories setup
target_link_directories(${CMAKE_PROJECT_NAME} PRIVATE
    # Add user defined library search paths
)

# --- DIFFERENCE: Completely new block added to dynamically locate files outside the main project folder ---
# A. Recursively find all source files in RocketDrivers
file(GLOB_RECURSE ALL_DRIVER_SOURCES
    # This is an example of importing all of the RocketDrivers into your C build
    #
    "RocketDrivers/*.c"
    "RocketDrivers/*.cc"
    "RocketDrivers/*.cpp"
)

# B. Recursively find all directories that contain .h files
file(GLOB_RECURSE ALL_DRIVER_HEADERS "RocketDrivers/*.h")
set(ALL_DRIVER_INC_DIRS "")
foreach(_headerFile ${ALL_DRIVER_HEADERS})
    get_filename_component(_dir ${_headerFile} DIRECTORY)
    list(APPEND ALL_DRIVER_INC_DIRS ${_dir})
endforeach()
list(REMOVE_DUPLICATES ALL_DRIVER_INC_DIRS)
# --- END DIFFERENCE ---

# Add sources to executable
target_sources(${CMAKE_PROJECT_NAME} PRIVATE
    # Add user sources here
    # --- DIFFERENCE: Added the dynamically found RocketDrivers sources and a C++ main file ---
    ${ALL_DRIVER_SOURCES}
    Core/Src/main.cpp
)

# Add include paths
target_include_directories(${CMAKE_PROJECT_NAME} PRIVATE
    # Add user defined include paths
    # --- DIFFERENCE: Added the dynamically found RocketDrivers include directories ---
    ${ALL_DRIVER_INC_DIRS}
)

# --- DIFFERENCE: The empty 'target_compile_definitions' block present in the original file was deleted in this version ---

# Remove wrong libob.a library dependency when using cpp files
list(REMOVE_ITEM CMAKE_C_IMPLICIT_LINK_LIBRARIES ob)

# Add linked libraries
target_link_libraries(${CMAKE_PROJECT_NAME}
    stm32cubemx

    # Add user defined libraries
)
References
- https://www.youtube.com/watch?v=aWMni01XGeI&t=301s